Configuring GeoBlocking
What is GeoBlocking and How Does It Work?
Identifying the Origin of Undesired Email
Enabling GeoBlocking and Understanding the Domain and User Levels
Adding Countries to the GeoBlocked List
Understanding GeoBlock Exemptions
Creating IP Address Exemptions for GeoBlocked Countries
What is GeoBlocking and How Does It Work?
GeoBlocking is an optional defensive filtering layer that prevents network communication from certain geographic locations.
In the context of UpStream, activating GeoBlocking will drop emails sent to the client organization’s domain from countries that are on the blacklist of unauthorized countries. Initiating GeoBlocking places another very early layer of filtering into position for the domain, meaning that any emails coming in will be checked against the GeoBlock list before proceeding on to any of the more advanced filtering steps. The GeoBlocking list is formulated by matching against emails showing the domain extension of that country (like .UK for the United Kingdom, .RU for Russia or .CR for Costa Rica) or from IP addresses that are registered in those countries by their respective geographic registrar.
The vast majority of organizations Tangent serves operate within the United States, with both their employees and clients stationed nationally; in these situations, they rarely have a need to communicate internationally. By blocking access from international countries, either entirely or selectively to just common troublemaker countries, absolutely massive cutbacks in attacks can be realized by shutting down these vectors.
Many organizations have come to see that the majority of attacks come from international locations, particularly nations unfriendly to the United States and other nations where prosecution of computer crimes are much more difficult to achieve. Common attacks that are familiar to nearly everyone are the common “419” or Nigerian Prince scam, fake Internal Revenue Service agents demanding payment in gift cards, Indian Technical Support and numerous other variations of spray-and-pray attacks executed with little effort.
Exemptions, or whitelists, for specific Sending IP addresses, domains and email addresses can be configured to allow for a very more carefully curated form of incoming emails from desirable senders, whilst still blocking every other sender from a country.
Before configuring GeoBlocking, there is an initial question to ask:
Is the intent to block countries that may potentially send spam to your users before they necessarily do so, by blacklisting all undesirable countries in advance? This is generally safe for most domestic organizations with no chance of international communications.
Or is a “wait and see” approach preferred, by blocking countries only when spam from them is detected, to avoid accidentally blocking any potentially legitimate email that may come in from overseas? This is the safer option for organizations who may occasionally deal with international organizations.
If the “block all before they send” approach is preferred, skip ahead to the “Enabling GeoBlocking” section.
If the more gradual “wait and see” approach is selected, proceed ahead with the “Identifying the Origin of Undesired Email” section directly below.
Note: Both methodologies still offer the ability to create exemptions for specified senders; this is largely a choice in how wide an initial scope of blocking is to be used.
Identifying the Origin of Undesired Email
When conducting a more granular blocking of countries, the recommended modus operandi is to identify which countries the spam is coming from, verifying that the organization does not have any sort of business in that country, then blocking that country. If there are counterpart organizations from that country that do need to be communicated with, the Exemptions section should be used to whitelist those senders.
To begin this identification process of the country of origin of any given message, begin by logging into the UpStream web interface using an administrative login.
Once in, select Reporting from the header menu, then select History from the submenu.
On the Mail History page that spawns, select Mail Filters to expand the filtering options available.
On the Message Flow filter, select Inbound from the dropdown box. This will limit the results of the filtering to only inbound emails and avoid the noise of having outbound emails included, for organizations using UpStream’s outbound filtering capability.
Once set, click Apply to render a list of recent emails received.

The list of emails received will now appear below the filtering options.
When surveying through these results, it is recommended to adjust the Entries Per Page to the maximum of 500 and then refresh the page. This will show a far greater number of results to obtain a better view of which emails are coming in and more data for review.
With the list of emails now available, hover over the IP addresses listed under the Client Address column. After a moment of hovering, the Country of Origin will appear, letting you know exactly where the messages are coming from. If there is a pattern beginning to appear of unwanted emails coming from certain countries, GeoBlocking would be a great way to cut down on these offenders.
Before proceeding ahead, it is best to inquire with internal administrators and department supervisors about whether anyone has any legitimate communication with organizations in the offending country, as exemptions will need to be made for them at the same time GeoBlocking is being configured.
Note: Spot checking of Outbound communications, if Outbound Filtering is in use on your UpStream system, is another excellent method of finding out if someone is responding or sending new communications to these countries. This can be performed with the same procedure used to find these messages, but merely needs the Mail Filter set to only show Outbound emails, rather than Inbound.

Enabling GeoBlocking and Understanding the Domain and User Levels
Before enabling GeoBlocking, it’s important to understand how GeoBlocking can be managed at a number of different tiers in Upstream: the Global level (active by default and accessible to UpStream Administrators only), the Domain level and the User level.
Each of these levels have their own individual rules, with the lower levels inheriting the rules from the higher levels by default. However, the lower level rules can supersede the rules of level above it if they have their own individual rules.
As an example, blocking Country A at the Domain level will cause all of the domain’s Users to inherit that rule. However, if there is a need to allow emails from Country A to an individual User, setting a country allowance for the desired User will supersede the rule at the Domain level and allow Country A’s messages to be delivered to them, but no one else at the Domain.
With this flexibility, it becomes possible to specify the ability to enable or disable GeoBlocking very granularly per user. By default, GeoBlocking is disabled at Upstream at the Domain level, and thus, all subsequent levels. If needed, the ability for individual Users to define their own GeoBlocking rules can be disabled also; please contact UpStream Support for enablement of this permission set.
To begin configuring GeoBlocking, log into the UpStream web interface and navigate to Filter Rules.
Click GeoBlocking from the submenu and verify if GeoBlocking is set to On or Off.
If set to On, proceed ahead to the next step of configuring Countries. Some systems will have it set to On in advance by UpStream Administrators, although no configuration is bound on it beyond the enablement.
If Set to Off, click on the Enable button on the right hand side. The system will take a moment to activate the service, after which it will reflect back with a green On status.

Adding Countries to the GeoBlocked List
With GeoBlocking now enabled, locate the newly spawned Country Rules section and click Add.

A dialog box will spawn that allows for the specification of the Country to block, along with a Comment entry about why the block was initiated, who requested it and a date stamp entry indicate when it went into effect.
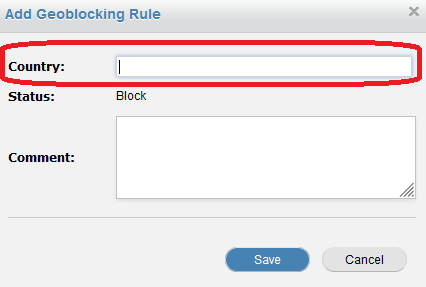
By typing in the first few letters of the Country desired for the block, a list of countries will populate and become selectable.
In the example below, typing in “cos” in order to block Costa Rica, a small list of related countries that could also match the “cos” were found.

Once the desired Country has been located, select it and enter in a Comment to detail the purpose of the block, then click Save.

After Saving the rule, it will go into effect and begin preventing all new emails coming from the blocked country.
Note: Emails being relayed from a blocked country to another separate country or via a service residing in an unblocked country will still get blocked, as UpStream traces the original source country of the email to ensure such common workarounds do not work.

If a GeoBlock rule is no longer needed at some point in the future, select the X symbol at the right hand side of it to delete the rule.

Additional countries can be added in the same fashion, leaving just the desired countries off the GeoBlock list to ensure they are not subject to such high level blockades.
Understanding GeoBlock Exemptions
Creating GeoBlock Exemptions for various senders that reside within a GeoBlocked country is the best means of ensuring their communications to the UpStream-protected organization is allowed, even though the remainder of the country is prevented from sending in any emails. This allows organizations who do conduct some international business to still receive those communications while resisting the other potential offenders that may also be present there.
These Exemption functions are found a little further down the GeoBlocking configuration page.
UpStream supports Exemptions with multiple potential scopes for such trusted senders, such as:
Whitelisting an IP address or range of IP addresses, which allows only specific gateways to bypass the GeoBlock.
Whitelisting a Domain (and any subdomains, if desired), which allows any senders from a specific domain and, if desired, their subdomains, to bypass the GeoBlock.
Whitelisting a specific Email Address, which allows only a single specific sender to bypass the GeoBlock. Multiple entries can be created for multiple individuals without clearing an entire domain.
Each Exemption method will be covered below, but in general, the Domain Whitelisting method is considered the least administratively-intensive method and offers the best results for possible changes in the Sender’s environment not needing to be kept up to date on UpStream or causing unintentional blocks.
Creating IP Address Exemptions for GeoBlocked Countries
To create an IP Address or IP Range Exemption, locate the “Sender IP Exemptions” and click the Add button.

The Sender IP Exemption box will now spawn.
Type in the Gateway IP address of the Sender to be authorized here (this can be found from the previous “Identifying the Origin of Undesired Email” section, but by looking at the sender from a desired Sender), and leave the default Netmask of /32 to authorize just the single IP address. If a range of IP addresses is desired to be authorized, select the Netmask of the IP range that the Sender owns (this is usually something best confirmed with the Sender first) to allow the appropriate range, such as /24 range offering a full 256 IP addresses from 172.226.99.0 to 172.226.99.255.
Note: It is a best practice to inquire with the Sender for their Primary and Secondary (if applicable) gateway IP addresses to ensure that their communications get through, so that even if they’re on a Secondary Internet Service Provider, their emails still arrive.

With the IP address information specified, populate a Comment detailing what this Exemption is for to aid in future administrative reference, then click Save.

Once the Exemption is saved, it will immediately go into effect and appear on the list of IP Exemptions.
Editing or Deleting the Exemption can be performed by selecting the appropriate buttons under the Options column.

Creating Domain Exemptions for GeoBlocked Countries
To create a Domain Exemption, locate the “Sender Domain Exemptions” and click the Add button.

A dialog box will appear allowing the specification of the domain to be authorized for clearance.
Enter in the domain name and top level domain extension for the domain to be cleared.
If there are any subdomains that might have potential senders, such as UpStream.Tangent.com or DMARC.tangent.com, check the “Include Subdomains” box as well to authorize any subdomains the parent domain may have.
Add in a Comment describing the purpose of the Exemption, along with a date stamp and name or initials of the administrator clearing them for future reference.
Once done, click Save.

Once the Exemption is saved, it will immediately go into effect and appear on the list of Domain Exemptions.
Editing or Deleting the Exemption can be performed by selecting the appropriate buttons under the Options column.

Creating Email Address Exemptions for GeoBlocked Countries
To create an individual Sender Email Address exemption, locate the “Sender Email Exemptions” and click the Add button.

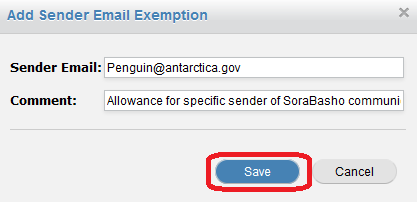
A dialog box will appear allowing the specification of the Sender’s Email Address to be authorized for clearance.
Enter in the Sender’s Email Address.
Add in a Comment describing the purpose of the Exemption, along with a date stamp and name or initials of the administrator clearing them for future reference.
Once done, click Save.
Once the Exemption is saved, it will immediately go into effect and appear on the list of Email Sender Exemptions.
Editing or Deleting the Exemption can be performed by selecting the appropriate buttons under the Options column.
